

Daniel Saunders
How to use React Context with TypeScript 2021 (Beginner Friendly)
TypeScript is a strict programming language built on top of Javascript to allow for easier debugging of Javascript code. It does this using a process called type checking, which catches errors in code even before the code runs. Because of these features, the developer experience is improved, and the code becomes more predictable and understandable. It has become popular in recent years.
In this tutorial, you will learn how to use the ever-popular Typescript, together with React Context to create a web application with a global state. Beginners should have no problem following this tutorial, however, if you would like to get the most out of this tutorial, some understanding of React and Typescript is recommended.
We will create a simple app that logs in a user and makes the user available to the entire application.
What we cover in this tutorial:
Setting up a React application
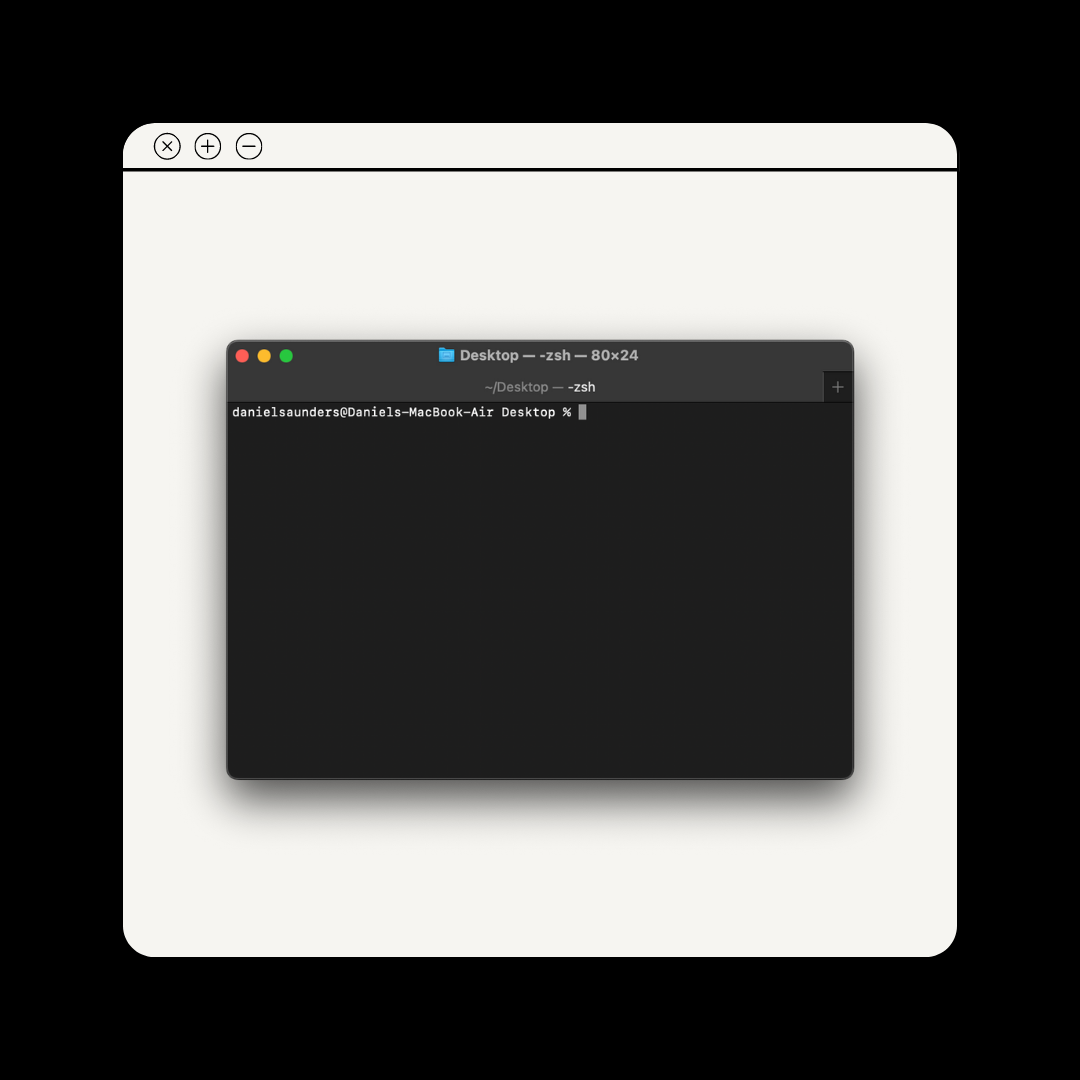
To create a React app with Typescript, you first need to cd to the directory in which you want the application to be stored, then run the following command in your terminal:
npx create-react-app my-app --template typescript
If you already have an existing React app to which you would like to add Typescript, you can check out this link .
Creating the types
Now that we have completed the setup. We can then move on to creating the context types.
Add a file to the root folder of your projects titled 'types.ts'. This is where all the types for your project will be stored. The first type we will create is a user type, then we will create the type for the user context.
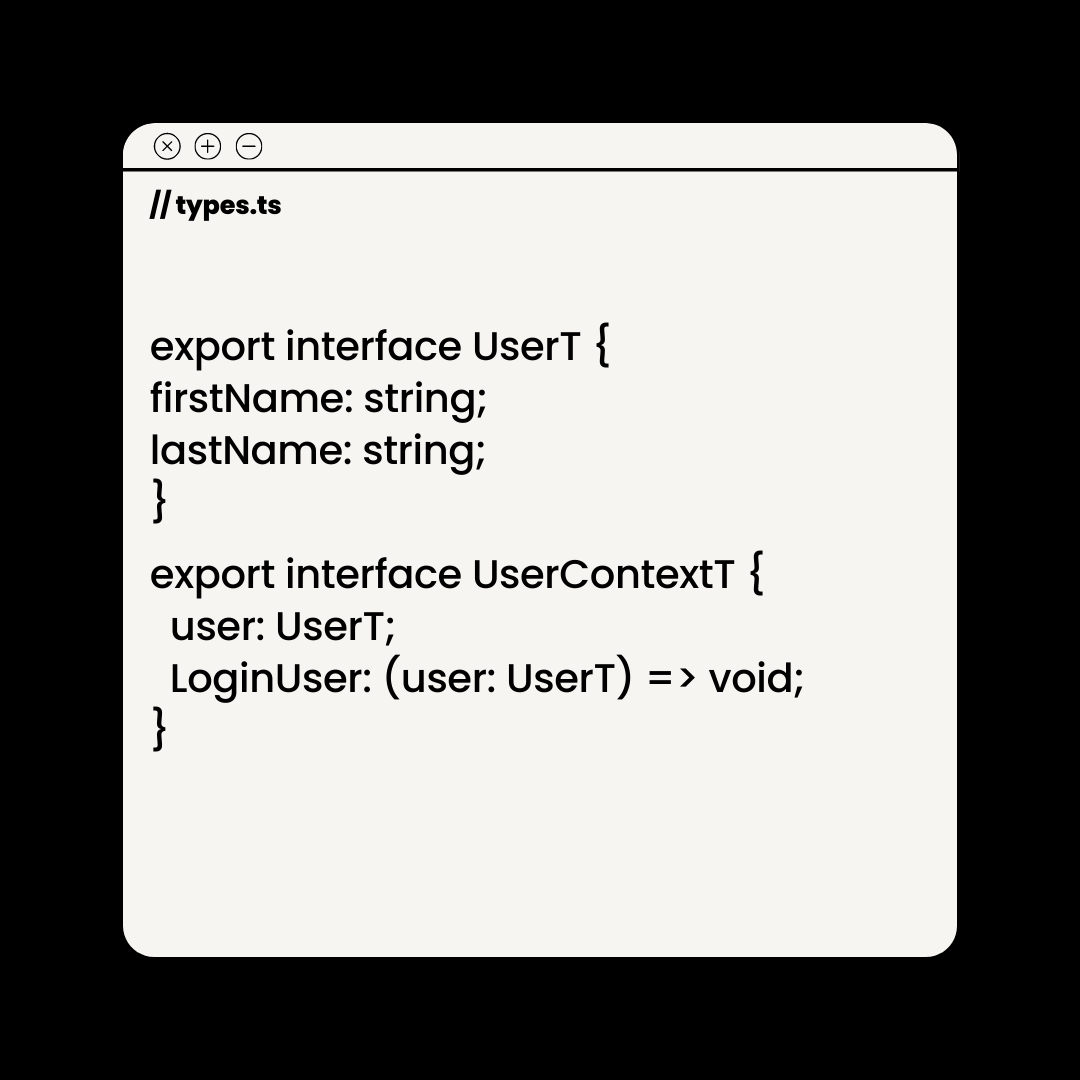
These types will now be available for us to use in any file.
Create the Context
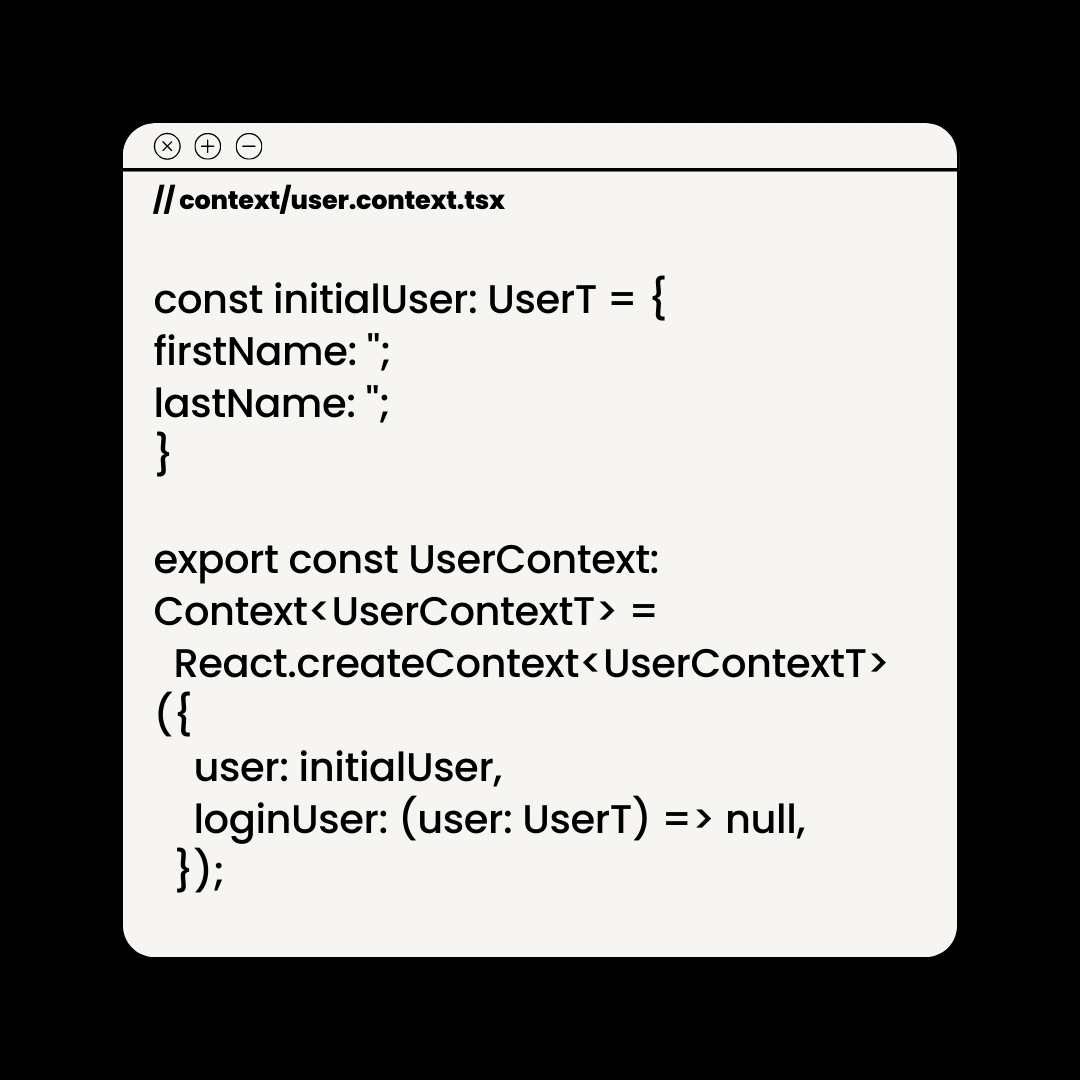
Now the types are readily available to us, we can now create the Context. Firstly we create a folder titled 'context' with a nested file called 'user.context.tsx'. Then we import the types which we created, and Context from React.
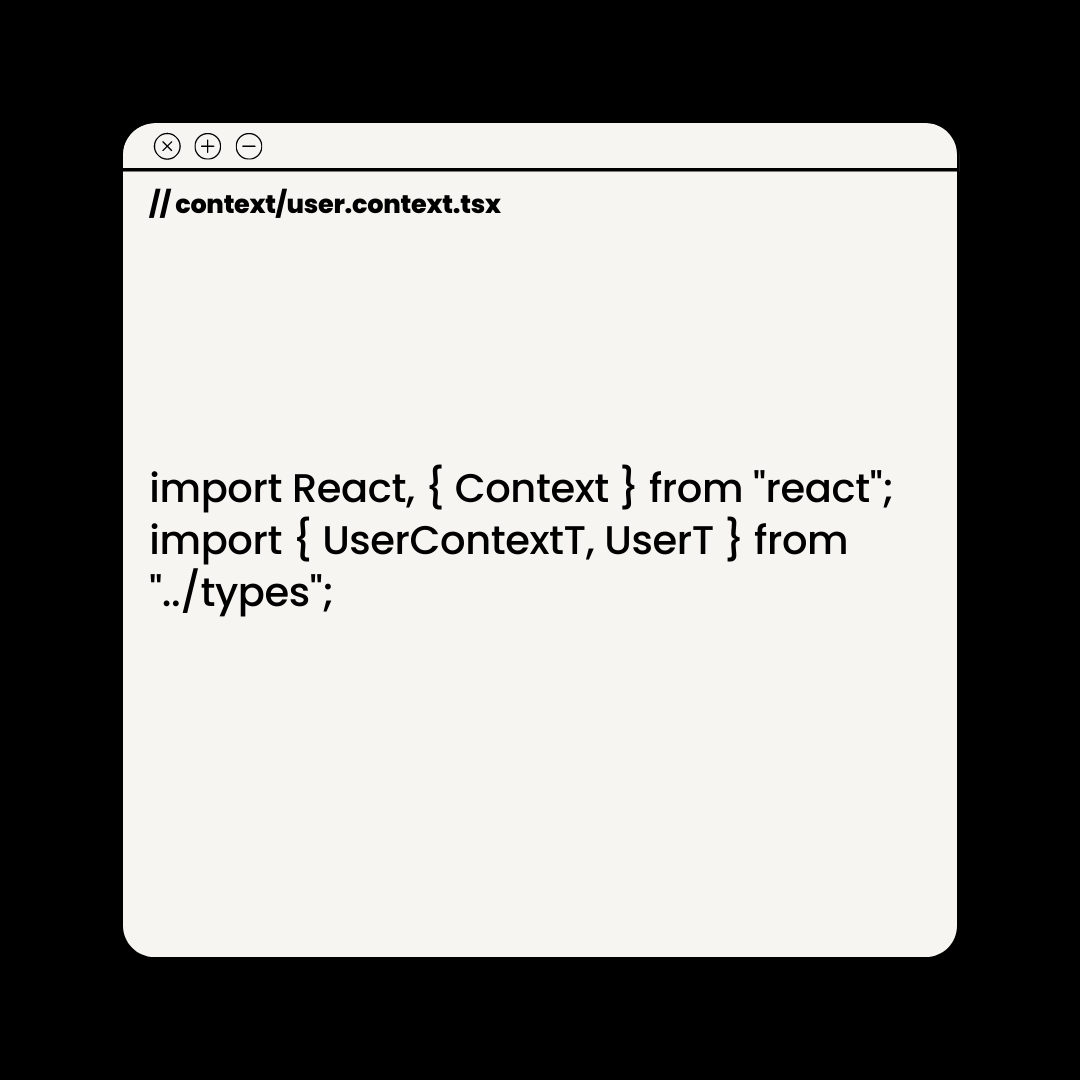
We then create the Context and specify its type to be Context. However, Context is a generic type, and therefore we need to add a variable type of UserContextT to let Typescript know what data to expect. We also need to create initial conditions that match the required types.
Context is an object that allows other components to 'consume' it. When a component is rendered and consumes a Context, the component will read the Context value from the Provider of that Context. This is how the state can be made available to the entire application. For more information, you can check the .
Creating the Context Provider
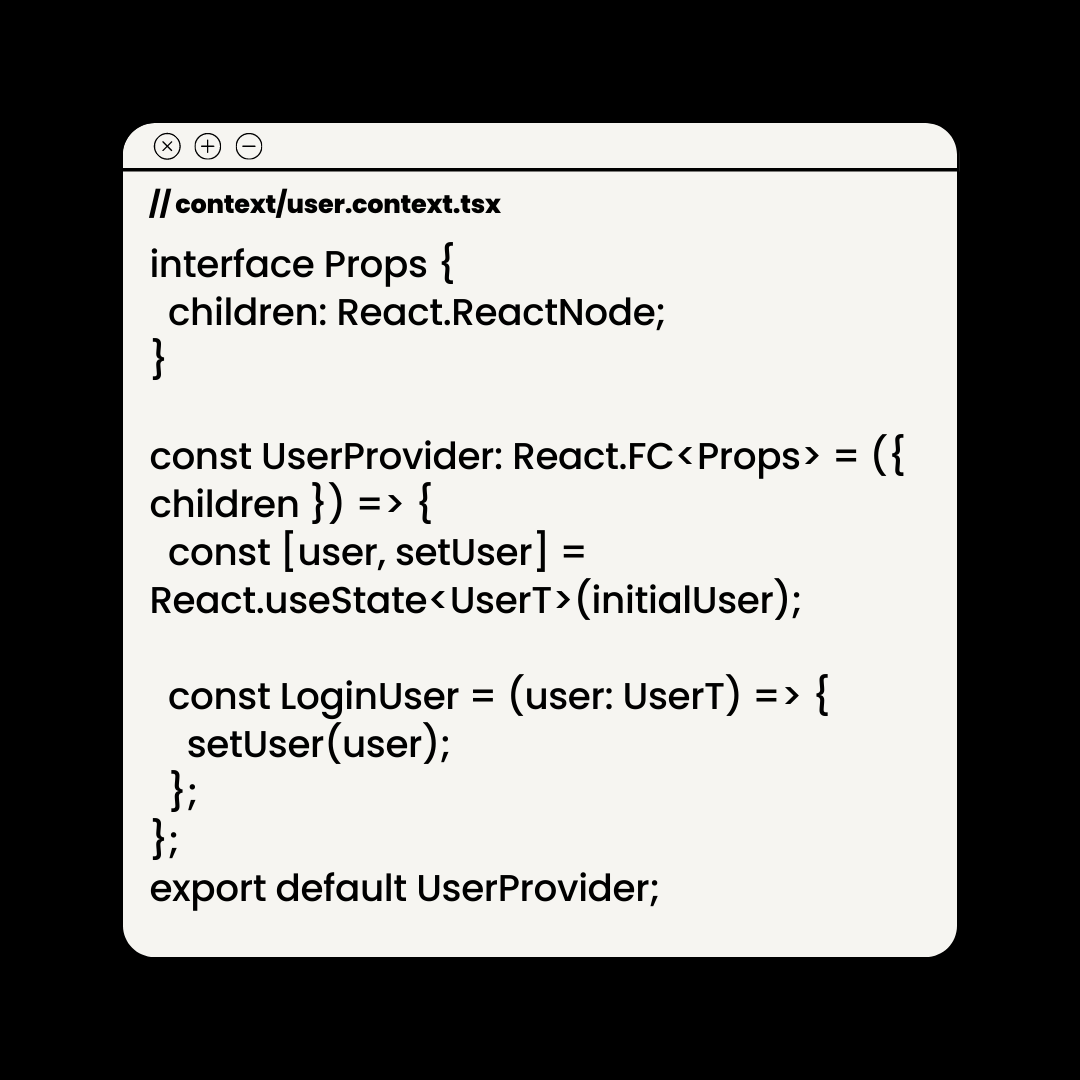
With our Context created, we can now create a component that we will wrap our application in to allow the application access to the global state. We would need to create a functional component that accepts children as a prop. These children components will consume the Context. We will then create a state that stores the user, and set it to the initialUser. We also create the login function that accepts a user and updates the global state to store this user.
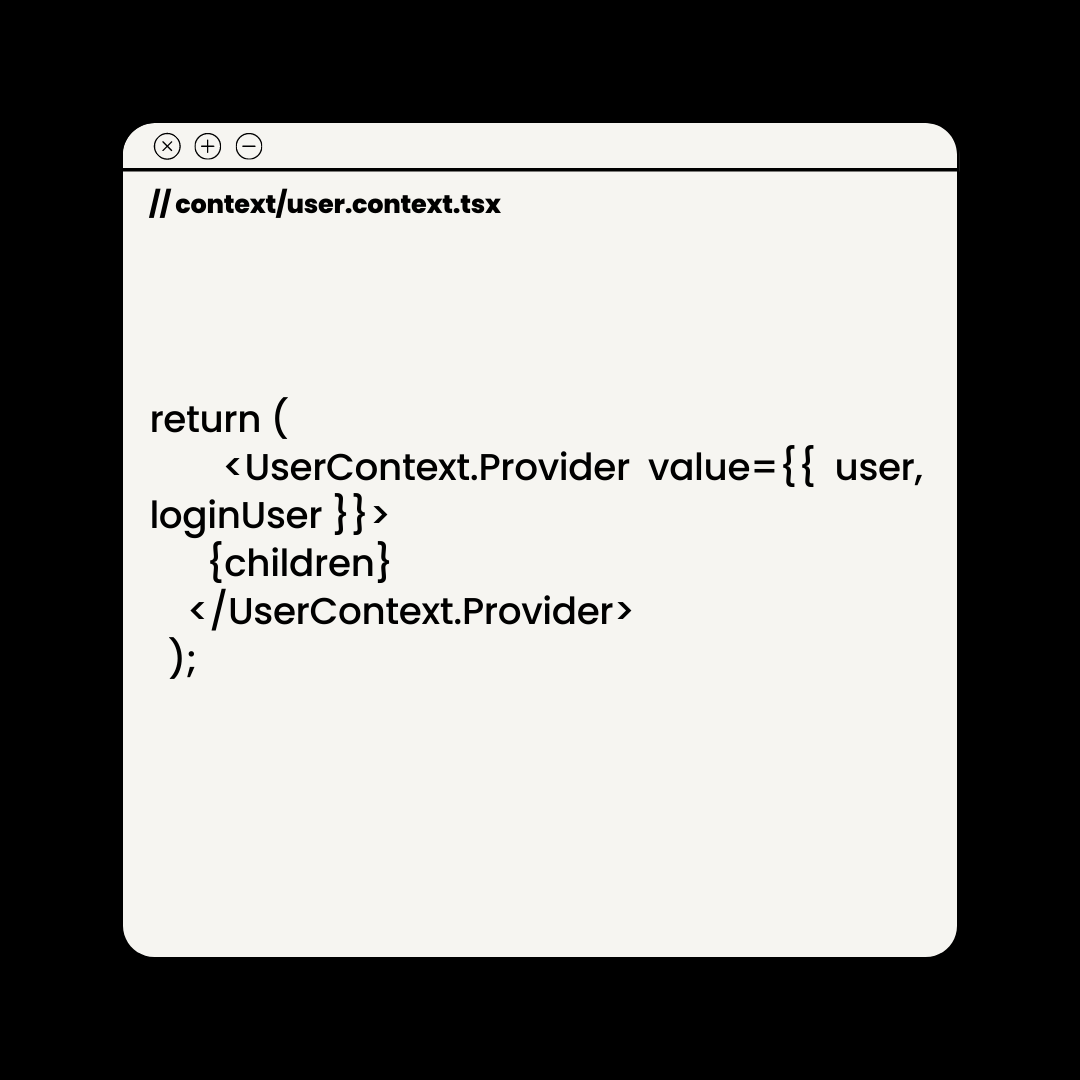
We then need to use the Provider of the Context object. The Provider allows all the components that consume the Context to subscribe to any Context changes. The provider takes a value prop that it then makes available to all the components that consume the context.
Subscribe to Context Changes
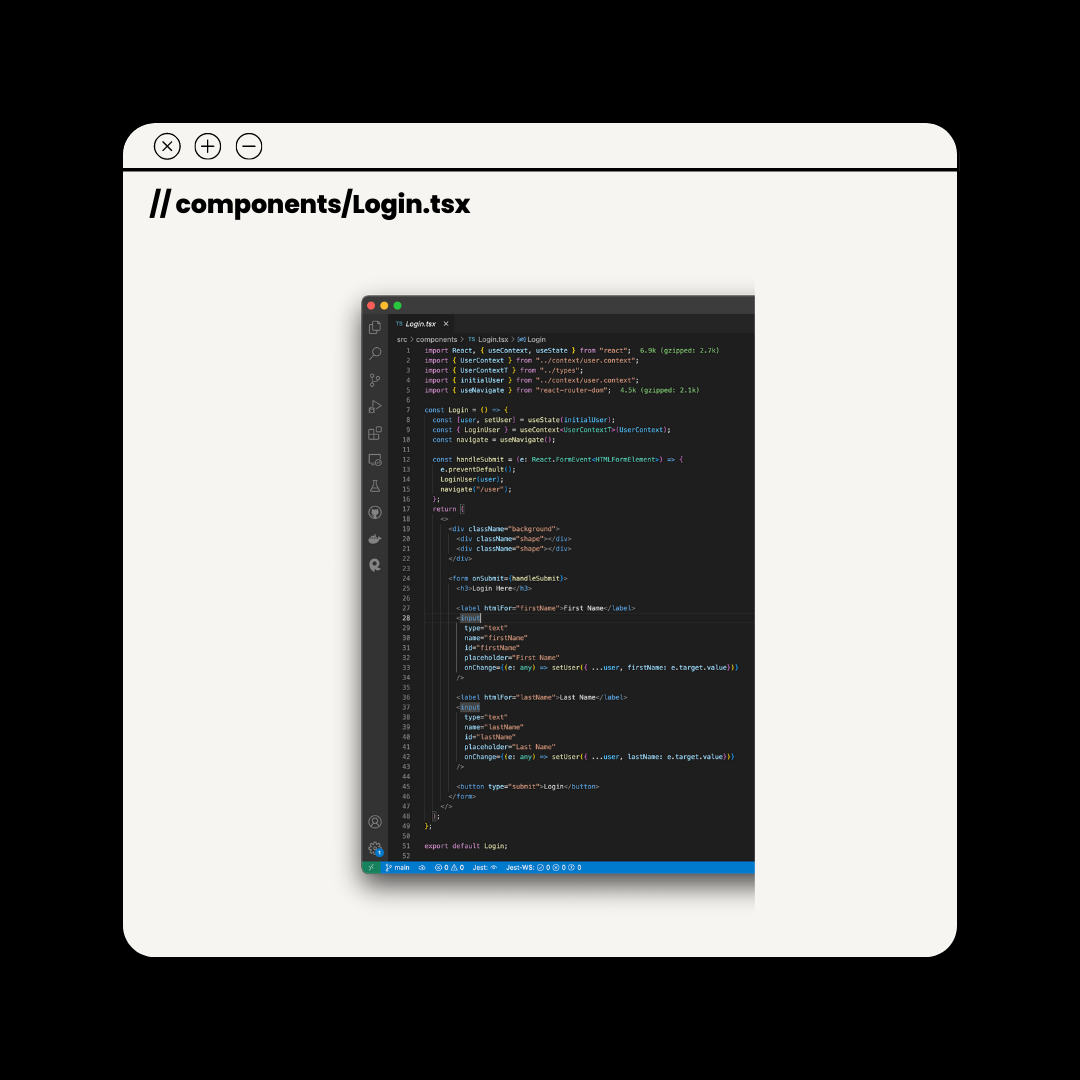
Create the Login component and use the useContext hook. For this project, I used some react-router.
The Login component is a simple form that accepts inputs from the client and stores them in a local state. We also import 'navigate' from react-router-dom and the Login function which we created on the User Context.
We then create a function that uses the local state to update the global state on submission of the form, then redirect the user to our other component.
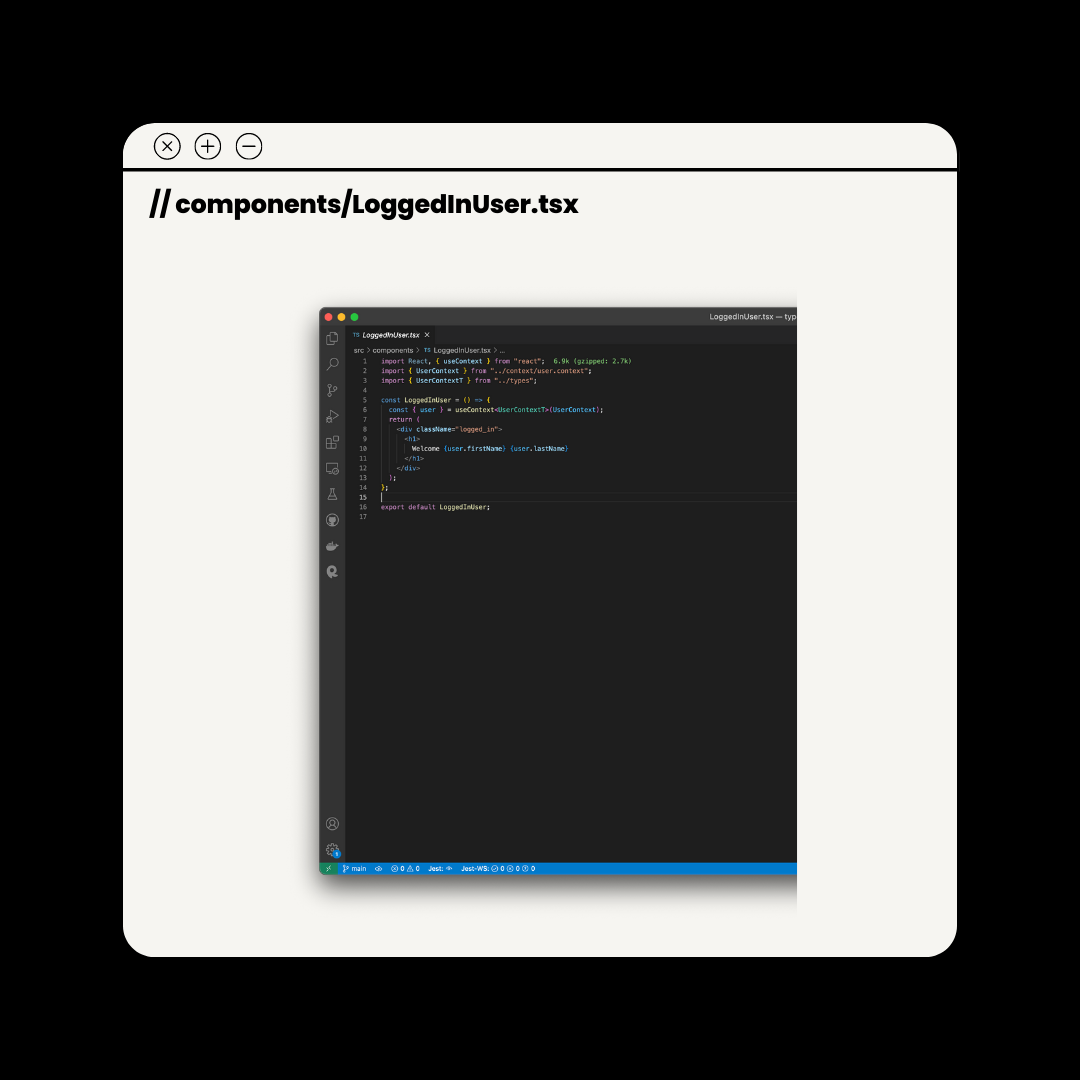
The LoggedInUser component uses the global state that was updated in the Login component to display the first name and last name of the client.
Consume Context
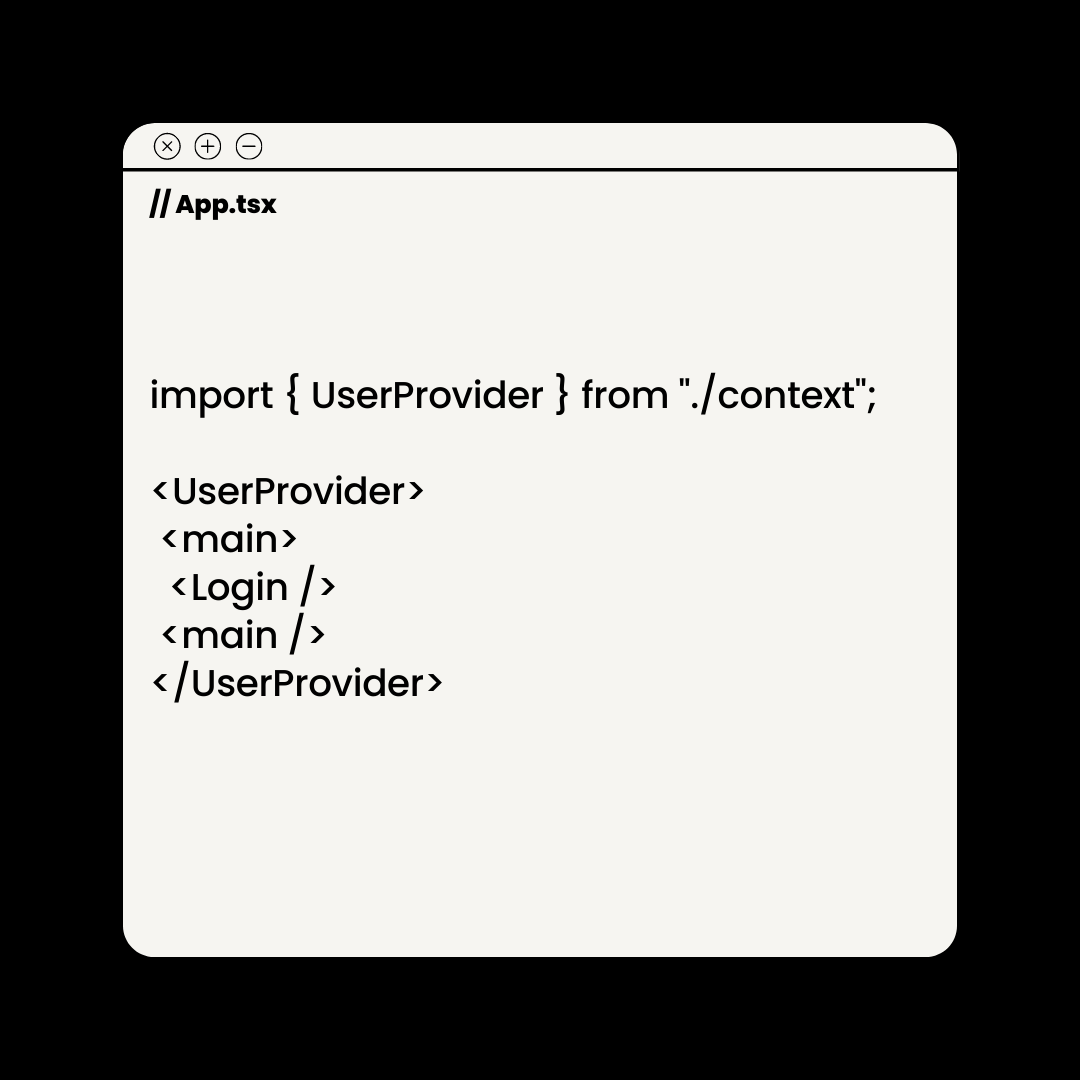
Import the provider component into the application, then wrap the components you wish to consume with the provider.
Conclusion
We can use Typescript to make our code more predictable and easier to understand. Today we learned how to use Typescript and React Context to update the global state of our React application. I hope we helped, and see you again soon!
Daniel Saunders
Full-Stack Developer